All the equipment and ingredients you need to be a ‘bucha master
By Jacey Gibb, Distribution Manager
Welcome to ‘Bucha Basics, where we cover everything there is to know about home-brewing kombucha
In my last column, I rattled on about how easy it is to make kombucha at home. With that being said, there are still a few things you’ll have to pick up ahead of time.
Depending on the clutter of your life, you probably already own most of the items on the equipment list. I have an unfortunate tendency to spend money on short-lived hobbies, so my advice is always to go thrift shopping when embarking on a new venture. Nothing on this list needs to be of particularly high-quality, and it’ll help keep the start-up costs low.
The equipment
One large pot: your standard cooking pot will do. Make sure it can hold at least 4L comfortably since that’s the amount most recipes yield. If your pot holds slightly less, just use less water and sugar.
Spray bottle and sanitizing agent: home-brewing is a delicate process and requires continuous sanitizing. Invest in a no-rinse sanitizer and a spray bottle to help make cleaning a breeze.
One large wide-mouthed glass jar: this is where the magic happens. I prefer a wide-mouthed jar because it allows the SCOBY to expand, but in theory, any large jar (at least 4.25L) will do. The jar also doesn’t need a lid, thanks to the next item on this list.
A semi-permeable cover: this goes overtop the wide-mouthed glass jar and allows air in while keeping everything else (especially fruit flies in the summer months) out. Cheesecloth, paper towel, or any similar material will do, as long as you can secure it with an elastic.
Several largish glass jars with flip-top lids: these will hold the kombucha during its secondary fermentation stage when you add flavouring agents. I’ll get into this in a future column, but for now, just invest in some large (about 2.5L) flip-top glass jars. Avoid cracked or screw-top jars, as these won’t ferment as well.
Lots of smaller screw-top bottles: these are for storing the final product after all the fermenting and flavouring is complete. If you’re currently nursing a kombucha addiction, then start saving the glass bottles it comes in. You can also use larger screw-top bottles but the kombucha will go flat quicker.
The ingredients
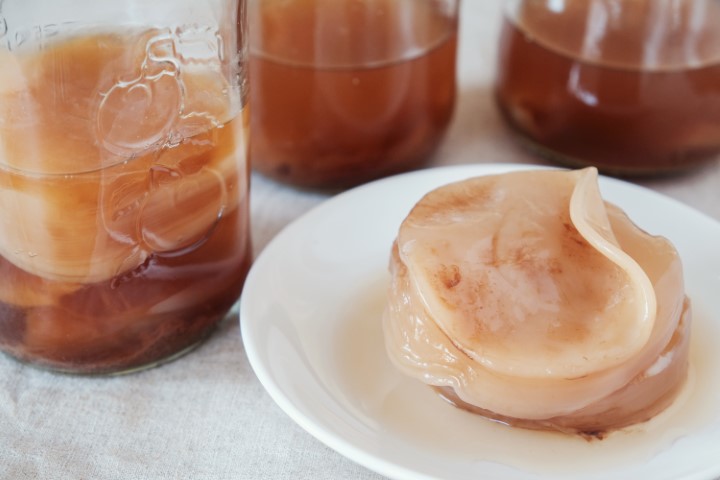
A SCOBY: an acronym for “symbiotic culture of bacteria.” This is the gnarly looking puck that makes brewed tea and sugar into delicious kombucha. You can order them online or buy them in-person from some tea shops, but the quality varies a lot in either case. My advice: hit up one of your kombucha-brewing pals, as SCOBY’s reproduce over time and it’s likely they can just give you one for free.
Distilled water: regular ol’ tap water won’t work for kombucha, so you have to buy distilled. Most grocery stores have 4L bottles for a few bucks. If you can’t find any in the bottled beverages section, sometimes distilled water is located in the health foods area.
Lots and lots of tea bags: use black tea bags and buy in bulk. I’ve experimented with using high-quality expensive tea vs. low-quality cheap brands, and I couldn’t tell a difference in the final product. It might seem excessive at first, but invest in one of those large boxes typically reserved for office breakrooms. Each kombucha batch uses eight tea bags, and you can potentially brew once a week, so it adds up.
White sugar: each batch uses one cup, so stock up.
Frozen fruit: another topic I’ll expand upon later. Just trust me that you’ll want to have a few bags stashed away in your freezer. Blueberries, peaches, strawberries, and mangoes are some of my favourites, but let your taste buds guide you.
Once you own all the above-mentioned items, it’s time to get brewing. Check back next week for a step-by-step breakdown of how to make kombucha without ever leaving the house.


