Shabby chic T-shirt surgery
By Sophie Isbister, Life & Style Editor
I’ll start this do-it-yourself tutorial off by saying that I am not a very crafty person—I can wreck anything involving fabric and scissors, but according to the Internet, it’s nearly impossible to mess up a T-shirt modification. So when my editor in chief, Sharon Miki, gave me an oversized The Other Press T-shirt to wear at the upcoming Canadian University Press conference in Victoria, I leapt at the chance to prove the Internet wrong.
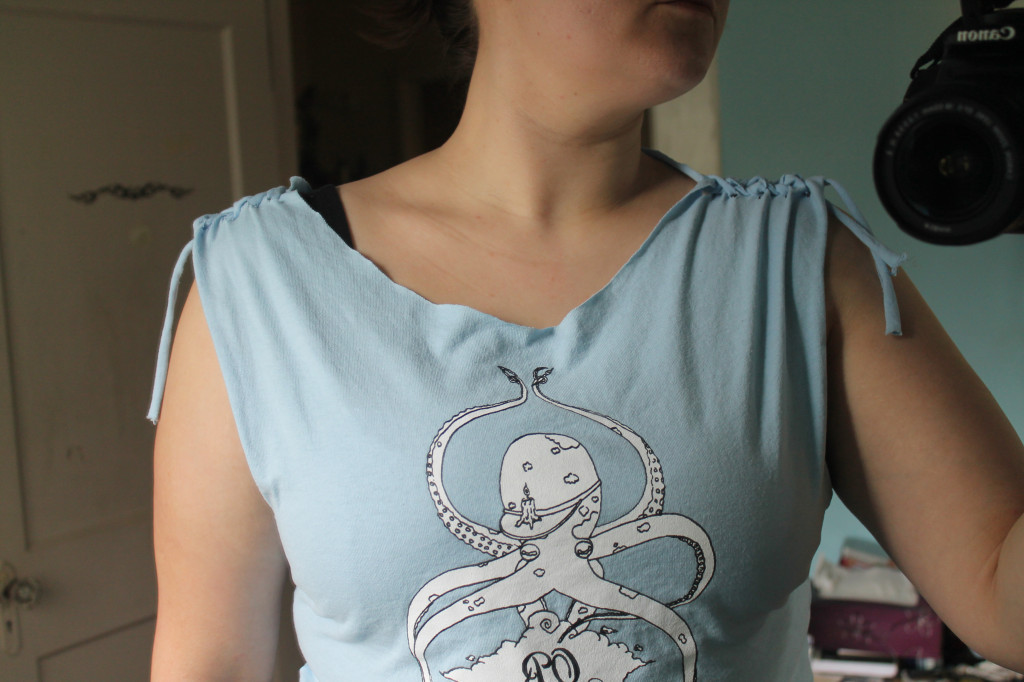
With Sharon’s blessing (“Do whatever you want to it!”), I decided to try my hand at a super simple, shabby chic T-shirt surgery. Using nothing but a needle, thread, and my own intuition, I’m going to take this shirt from baggy to bangin’. I’m going to cut out the neck, sleeves, and sides, and lace the straps together at the top with strips of T-shirt, and then I’m going to tell you how I did it.
Start out with:
- 1 T-shirt that’s a little too big
- Measuring tape
- Sharp sewing scissors
- Marking chalk or pen
- Sewing needle
- Thread
Step 1- Cut the neck out:
Lay the T-shirt out face up on a flat surface in a well-lit work area. Use your measuring tape and chalk to mark out three dots where you want your new neckline to be, one on each shoulder seam about three inches from the existing neckline (the exact measurement is up to you), and one about three inches below the existing neckline in the center of the shirt. Then, creating as clean a cut as possible, cut the front of the shirt. Then cut the back neckline just under the existing neckline.
Step 2- Sew up the sides:
Turn the shirt inside out, if it isn’t already. Determine where you want the new sides to be: measure yourself around the waist, halve that number, and use it to mark on the shirt where you’re going to sew the new sides. Make the line curve at the waist for a fitted look. One you’re done marking from hem to armpit, thread your needle and do a basic stich along each side (this is where you can use a sewing machine if you have one). Don’t bother cutting away the excess fabric—you can do this after you sew it, and even try it on for fit before committing to the size.
Step 3- Cut off the sleeves:
This part is easy. Cut the sleeves off the shirt by laying it flat again and cutting the whole sleeve off each side, seam and all. Set the sleeves aside because you’re going to need them for the next step, also known as the “tricky part.”
Step 4- Lace the tank top straps:
This is where it gets difficult, but this step will also give your shirt more shape and—dare I say—intrigue. First, cut two-inch-wide strips out of your discarded sleeves to make laces. Then go back to your T-shirt, which should now look like a tank top with very wide straps. Cut these straps along the shoulder seam, cutting the seam completely out and discarding it. Make a few holes (think button holes) on each side of the strap and then, working with the shirt right-side-out, lace the two sides of each strap together from the neck out, so you’re left with extra lacing on the shoulder.
Step 5- Clean it up:
Because this is DIY, you will probably do things a little differently than the exact instructions. After I finished steps one through four, I put the shirt on and identified where to cut more fabric off. When I tried it on there was still too much fabric around the back neckline and along the straps, so I marked where I wanted to cut while the shirt was on my body, then took it off and got to chopping. The great thing about jersey knit is that it won’t fray or pull too much, so it’s easy to just keep shaving inches off. It’s easy to make something stylish (yet rugged) without needing to sew hems or anything fussy like that.
I hope you enjoyed this super-DIY custom tank top tutorial! There are tons more fun T-shirt ideas to be had on the Internet, so as the weather gets better, I hope to see some of you out there in sassy shi
