Tips and tricks from my own trial and error
By Sophie Isbister, Life & Style Editor
Having great-looking nails can be costly if you’re the kind of person who likes to go to the spa. But if you’re a short-on-cash student, spending $35 per week on flawless fingers just isn’t realistic. Getting that professional look on an amateur budget takes a bit of work and practice, but it isn’t impossible. Great nails can make you look put together—and for the men reading, having clean, trimmed nails can place you a few steps above the rest.
Step one to great nails is preparation. Take off your old polish and assemble your supplies: cuticle oil, a cuticle pusher, nail polish remover, and a nail file. Getting your nails prepped is probably the most time-consuming part of the process, but once you do it the first time, you only have to do it every week or so. I change my polish about every three days, and I only file every second or third time. I also never cut my nails: filing is all you need, unless you’re dealing with a broken nail emergency or excessive growth.
Once you have your polish off, file your nails. A cheap emery board from the drug store is best—metal files can damage your nails, and the gimmicky crystal glass ones, while bringing some benefits to the table, are expensive and prone to breaking. File in one direction, then file under the nail a bit to get rid of the excess nail dust. The common nail shapes are square, squoval, round, oval, or almond. I recommend square or squoval for beginners; rounds and ovals can easily look messy and uneven.
Before you apply your polish, do another swipe over all your nails with nail polish remover. This removes any oil that may have transferred from your skin, making a clean surface for the polish. Then you can start applying colour.
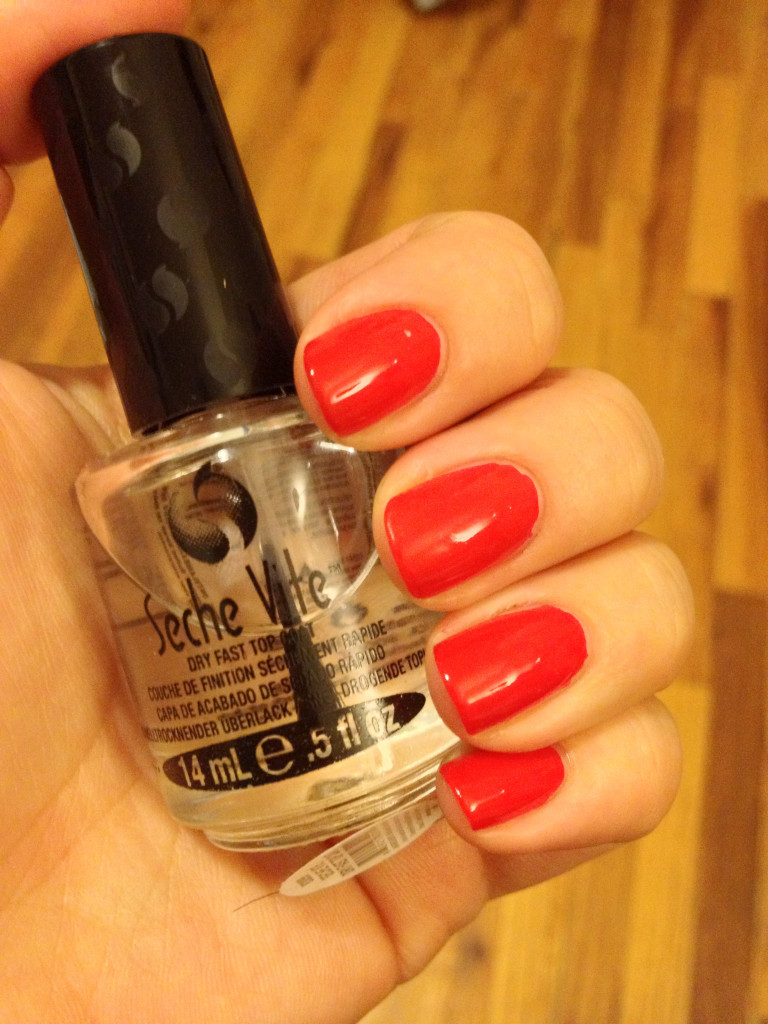
Always start with a base coat to protect your nails from staining over the long-term. Once you’ve got that on, make with the colour! Some notes on colour: if you’re learning how to do your nails perfectly, start with a bold colour like a matte red. This will show off any imperfections, allowing you to see areas where you need to improve. Also, contrary to popular belief, you don’t need to let your polish dry between coats. Just keep piling it on.
Brush technique is important. Dip the brush in the polish, and when you pull it out, wipe the excess from one side on the edge of the bottle, leaving one side with the perfect amount of polish for one coat. Paint it evenly onto your nails, leaving a gap between your cuticle and the polish. The gap will be imperceptible, but it will make a clean line of colour on your nails, and it basically guarantees you won’t splash colour on your cuticles. Always do at least two coats—always. If you’re not going to do minimum two coats, then don’t bother doing your nails at all.
The second to last step is top coat. Picking a good top coat is important, but don’t worry, I’ve made it easy for you! Seche Vite’s Dry Fast Top Coat is the best product I have ever bought for my nails. It’s pricier than others (around $11 at London Drugs, but half that price at a beauty supply store), but it shines brilliantly, dries super fast, and will prevent chipping for a few days. I can’t recommend this product enough!
The final step is drying, and really, the only thing that helps with this step is a Zen-like attitude. I’ve tried a few different ways to shorten this process—spraying baking spray (like PAM) on your nails is supposed to protect them while they dry, and there are also fast-dry drops you can buy—but a quick-dry top coat plus a much needed television break will usually do the trick!
Taking some time to pamper yourself is important—in our busy lives, we often forget to take care of ourselves. Having impeccable, attention-grabbing polish, perfectly applied in bold and trendy colours, has definitely contributed to my overall self-image. If you haven’t already converted to nail mania, you should start today.


